Pages

Friday, October 30, 2009

♥ Toxic Glitter Slime ♥


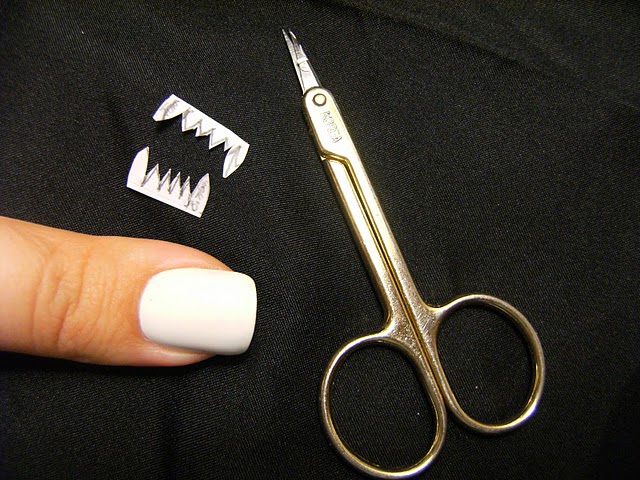
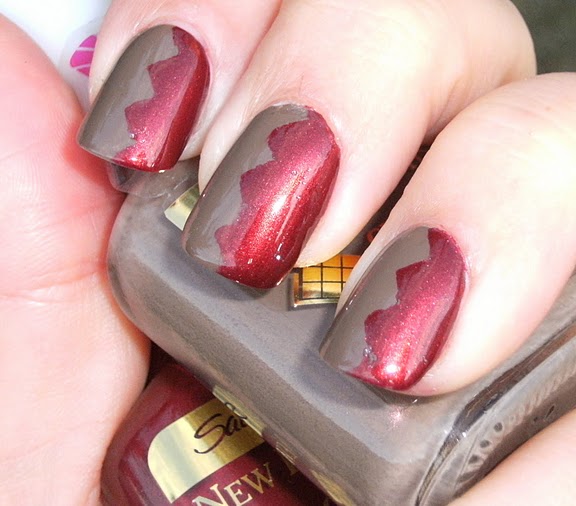
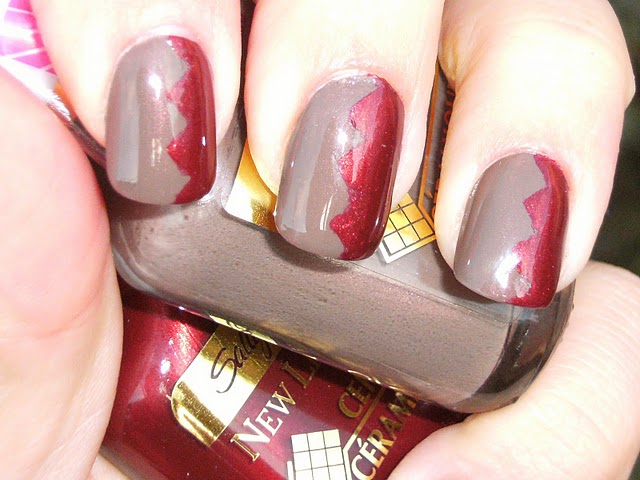
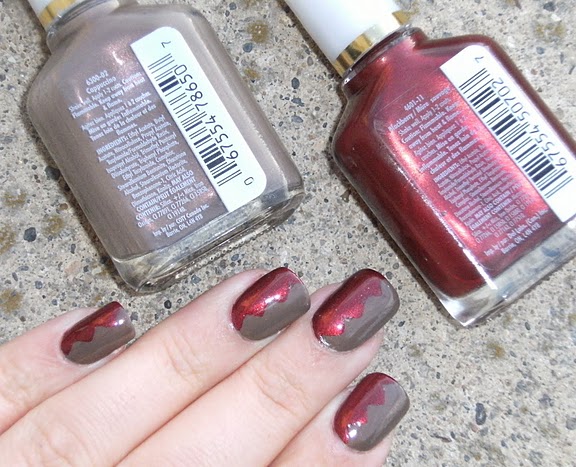
After a day of black and white = I needed color. I kept with my dripping' stuff' theme and redid my toxic waste mani - except this time I added some Glitter! I used Sally Girl 'Way 2 Disco', I got it open without pliers this time. I think I did a better job on the last one though... with my 'drippy' stencils.... Just like the other 'drippy' manis I have done, but with glitter. I started with a coat of stark white and then:

Base Color- Billie 'Green Meadows' 2 coats
Glitter - Sally Girl 'Way to Disco'. 1 coat
~ apply 'drippy-stickers' that I cut out from mailing labels
2 thin coats of Sally Hansen Black
2 coats of Nailene Acrylic Strong Top Coat

Letting all coats dry in between.

Viola - The glitter adds alot of dimension to this mani, These photos are after a day of wear and some last minute Halloween decor. When i did an acetone clean-up, i marred my ring finger and tried to fill in the black that was missing..... too mush acetone = CUTICLE CRUELTY =  but I have found an even better barrier when avoiding getting polish on my nails, Avon Moisture Therapy intensive hand lotion. Also Avon has some really nice colors for polish right now, I rarely see any on modeled on the interwebz....... I would love to see some of the newer line swatched, especially the intense yellow and the pretty teal and hear about the formula. ( LINK )


 This stuff is sooo awesome, it is very very thick, so I use a tiny brush to brush it on my cuticles and around my nail bed before I polish. This reduces the amount of acetone I have to use when I tidy up any polish mistakes..... I imagine any 'barrier cream' would work well. I like this alot better than using Vaseline which was very runny and often got onto my nail bed. I am way to clumsy for that and so this works out better.


  ~ Fluorescent Lighting ~


  ~ Fluorescent Lighting ~


  ~ Fluorescent Lighting ~


 ~ Fluorescent Lighting ~


 ~ Fluorescent Lighting ~


  ~ Fluorescent Lighting ~


  ~ Fluorescent Lighting ~


  ~ Fluorescent Lighting ~


 ~ Fluorescent Lighting ~

Wednesday, October 28, 2009

♥ VAMPIRE FANGS ♥


 I think with a little more practice this would look cool. I didn't put alot of love into this nail art, because I doubt I would wear this out of the house...... I will definitely work on my fang placement for the future. All photos are in fluorescent lighting.

For these vampire fangs I used;

♦ Billie White as the base =2 coats
♦Sally Hansen 'Raven' = 2 THIN coats
♦Billie 'Claret' for the .....dripping blood


♥ SCARY MONSTER CHOPPER'S MANI ♥


A very simple mani ~ I started with a white base, applied 1 coat of T.C. & let dry thoroughly, applied jagged 'teeth' stickers that I cut out, applied black polish = let dry then removed stickers, buffed out any raised areas and applied 2 coats of T.C. I wasn't going for a 'Vampire' look, more of a jagged monster teeth look. But~ I am likely going to do just 2 fangs for my next 'Halloween look' . While my symmetry & placement needs a little work, I think this looks pretty cool for the first time trying this!

I totally did not want to take off my 'Toxic Waste Mani'... that was soooooo cool!

Each one of my nails is different I have never done this before and was doing a little experimenting for the future. I made sure that the 'teeth-stickers' would fit across the width of my nails. I will be applying a Top Coat over my base color, anytime in the future that I decide to do any nail art like this......

Ideally droplets of blood on the 'fangs' would take this over the top - but I aint gonna do that. Below are the steps to doing this... your imagination is the limit with these types of nail art. I Love, LOVE, LOOOOOVE all the awesome Halloween nail art I have seen over the last few days! Soooooo coooool!

~ I cut out scary sharp teeth from mailing labels, wide enough to fit across my nails ~


~ applied 'teeth-stickers' to clean dry nails ~


~ Applied 2 THIN coats of black nail polish ~


~ Super-close-up - let nails dry thoroughly before removing stickers ~


 ~ Below -  Flash ~


polish's I used,

Sally Hansen M.G. - 'Pure White'
Sally Hansen N.L. -Ceramics 'Raven
 Nailene Acrylic Strong Top Coat


Monday, October 26, 2009

♥ Toxic Waste Mani ♥


 ~ Toxic Waste Mani ~


Base = Billie 'French White'
Toxic waste base color = Billie 'Green Meadows'
Black Background = Sally Hansen 'Raven'


So; I did not end up adding glitter to this mani, yet. ~ I did this the exact same way as the other 'dripping' mani's below.  I started with a base of pure white, added two coats or this ridiculous bright green for the base color, and then affixed 'dripping' stickers to my nails, and then painted on two thick coats of Sally Hansen - 'Raven' I was heavy handed with the black polish , and you can see how my 'drips' are not uniform. I also took off the 'sticker's a little too soon. I buffed out any raised areas and then sealed it up with China Glaze Fast Forward.


When I did this mani, before I put the stickers on and added the black, I walked into a dark room and I could totally see the light reflecting off this Billie polish 'Green Meadows' (link ).....  This green layered over stark white its friggen bright! This has given me countless ideas for future nail art... simple nail art.


~ Fluorescent Lighting ~

 ~ Flash ~

~ Flash ~

~ Flash ~

~ Fluorescent Lighting ~

~ Fluorescent Lighting ~

~ Fluorescent Lighting ~

~ Flash ~
 ~ Fluorescent Lighting ~

Sunday, October 25, 2009

♥ A Real Bloody Manicure ♥


~ "A Bloody Manicure" = various reds & a solid black polish ~

 Alright - my internet has been out all evening, I finished up this newest version of 'A Bloody Manicure' right after my last post.... I have included photos of the little 'sticker guides' I cut out; and step-by-step photos of this process....

So now the 'blood' is dripping from the tips of my nails... like it should. This is grossing me out immensely, but it looks really cool! I am happy with the brand of mailing labels I use for 'sticker-guides' when I do nail art like this. I think when I have enough ideas, I will draw them on the computer & then print them onto sticky paper or mailing label sheets, so that I can cut them out without having to draw them by hand.This brand very rarely leaves any residue behind.

 I have used different colors of red creme nail polish  for each of my nails. I think this nail art will look great with any color combo- and am working on my next one as I type this.

So here are the color I used.....
THUMB = Mavala  '70 Salerno'
INDEX = Billie 'Claret'
MIDDLE = Billie 'Chianti'
RING = Billie 'Bordeaux'
PINKY = Billie 'Zinfandel'

I picked up these "boozy' Billie nail polish's a while ago and have never worn them .. so skittle time!
All were two coats with the exception of my PINKY, 'Zinfandel', I totally thought that these 5 polish's were all cremes, but the 'Zinfandel' was a jelly'. After applying the polish, I used 1 coat of China Glaze Fast Forward, and waited for it to dry, I applied the 'sticker-guides' I cut out, and then painted on Sally Hansen 'Raven' 2 coats. when I was sure it was totally dry ( 15 min ) I carefully peeled off the 'sticker-guides' from the tip of my nails to the base -  then gently buffed out any raised areas. I made sure to wash off any dust or possible residue, then applied 1 coat of China Glaze Fast Forward.

Cutting out this shape was a little tricky, I made sure to draw the 'Blood-dripping' in the shape I wanted it, and used a very small pair of manicure scissors. I purposely made the drips different on each nail, I think it looks more realistic. Like I had to fight off a werewolf..... well, depends on which werewolf.

I hope I gave good directions ~  your imagination is the limit when it comes to nail art... any art really. I am cook'in up some other neat art ideas and I am having tonnes of fun. Anyhoo- onto the photos ♥


~ I drew an outline of the 'dripping bloooooooooooooood, before cutting~


  ~ Sorry this is so fuzzy - I made sure that the little 'sticker-guides' would be large enough for each nail~


- be sure to press down all areas of the sticker to prevent your other color from seeping beneath it.~


~ After applying Sally Hansen 'Raven' - 2 thin coats ~


 ~ Thumb  = Mavala 'Salerno'
 

~ INDEX = Billie 'Claret'~
 

~ MIDDLE = Billie 'Chianti' ~
 

~ RING = Billie 'Bordeaux' ~
 

~ PINKY = Billie 'Zinfandel' ~


~ Shade - Flash ~


~ Shade - Flash ~


~ Shade ~

 ~ Shade - Flash ~


Top =  Sally Hansen 'Raven' a true deep black polish & ChG Fast Forward
L to R - Billie 'Zinfandel', 'Bordeaux', 'Chianti', 'Claret', Mavala 'Salerno'


♥ Midnight Madness Murder Mani ♥

 ~ Billie 'Claret' 2 coats & Sally Hansen 'Mocha Madness' 2 coats ~
~ this looks way more florescent Orange than it really is ~

I whipped up this mani late, late at night. I wasn't really sure how it would turn out - I think it turned out really neat. This is two coats of Billie 'Claret' ~ I was doing some experimenting with the polish's I have that look like blood.  I cut out the 'dripping' stencil from a mailing label and affixed it to my nails, then painted 2 thin coats of Sally Hansen 'Mocha Madness'


Now; I know that the 'Blood' is dripping from the direction of my cuticles. It grossed me out thinking I would have bloody nails... from someone or something else..... possibly clawing my way to bargains at a massive sale on nail polish. So I decided to have the 'blood' dripping away from my cuticles.


At the moment I am re-doing this mani to have the blood dripping towards my cuticles...... Ewww~ I'm not sure I can write "blood dripping" anymore, it's grossing me out! YUCK. I think it will look cooler to have the dripping towards my cuticles. When I did this last night I did not take photos of the process, or the little stencils I had made.. it's not hard at all & I think this will look cool with any contrasting colors.... At some point int he future I will do a solid black with neon green glitter for a toxic slime mani, that will look sooooo cool!
 
All my photos are indoors under florescent lighting and just plain indoor lighting.


Saturday, October 24, 2009

♥ CHAINSAW Mani ♥


So after spending the day wearing Sally Hansen Cappuccino I wanted to do something a little different. I got my pinking shears and mailing labels out, and cut out a zig-zag pattern. I made sure my nails were clean and free form moisturizer & other stuff and affixed the 'zig-zag' sticker to my nail, I painted two thin coats of Sally Hansen New Lengths in 'Blackberry'. When it was dry~ I removed the 'zig-zag' stickers, gently buffed out any raised areas & applied 2 coats of  Sally Hansen Clear Nail polish. This polish 'Blackberry'= is stunning. I didn't really think much of it when I bought & swatched it, but looking at it now... just wow. There is sooooooo much shimmer packed in there! And this sorta dull plain polish 'Cappuccino' is the perfect partner to show off 'Black Berry's' beauty.


Anyhoo- because Halloween is coming up, I thought I would call this a 'Chainsaw Mani' because of the sharp jagged zig-zag pattern with the red polish. Even though I took my time and applied those 'zig-zag' stickers carefully, I still had a few 'mistakes' ( RING finger) I did this outside in the gusting gale force winds as well, so I had a real lumpy application, especially with the clear polish top coat.... But it looks cool, and I am glad I didn't choose to go with my safe and simple 'S' curve design..... Maybe next-time.

 ~ Some gorgeous foliage I came upon my walk today..... I hate the cold temperatures, but I love when leaves and shrubs turn color like this! Above = no flash , Below = Flash ~


~ Below - Sally Hansen Cappuccino - 2 coats & T.C. = FULL POST HERE ~


~ The mailing label stickers I cut out with zig-zag scissors = 1st coat ~
{ I'm outta canned air for dust bunnies in my keyboard - pls. ignore}


~ Shade with Flash ~

~ Shade with Flash ~

~ Shade with Flash ~

~ Sundown ~